1. Introduction
What you’ll build
In this codelab, you will build a KYC Copilot application. Your app will:
- Use Python to process incoming documents and connect with the Gemini API.
- Run on Cloud Run for automatic scaling and a fully managed runtime.
- Use Gemini to analyse documents, generate risk scores, sentiment tags, and priority levels.
Why This?
What makes this project powerful is the combination of Python, Cloud Run, and Gemini. Together, they enable you to build intelligent, serverless applications that automatically process data and generate insights.
Gemini
Gemini is Google’s family of generative AI models, designed for text (and multimedia) understanding, reasoning, and creation. With Gemini, you can summarise content, classify text, extract meaning, and generate human-like responses. In this codelab, Gemini will analyse incoming documents and produce concise summaries, along with structured insights like risk scores and priority levels.
Cloud Run
Cloud Run is a fully managed compute platform that runs your containers without you needing to manage servers. You package your app in a container, deploy it, and Cloud Run scales up as requests increase and down to zero when idle. This makes it ideal for event-driven or API-driven workloads, where flexibility and cost efficiency are critical.
Firestore
Firestore is a highly scalable serverless document database that provides virtually unlimited scalability and industry-leading availability. We would store the results of our KYC copilot analysis in Firestore.
Note: This codelab uses Python; however, no prior Python experience is required, as all code snippets will be provided.
What you’ll learn
How to set up triggers from Google Cloud Storage to Cloud Functions How to containerise a Python app and deploy it on Cloud Run How to call the Gemini API from Python. How to build a simple but powerful workflow that uses AI to analyse documents.
What you’ll need
A Google Cloud project with Cloud Run and Gemini API enabled. Internet-enabled device (preferably a laptop/PC)
2. Before You Begin (setup)
Create a project
- In the Google Cloud Console, on the project selector page, select or create a Google Cloud project.
- Make sure billing is enabled for your Cloud project. Learn how to check if billing is enabled on a project.
- You’ll use Cloud Shell, a command-line environment running in Google Cloud that comes preloaded with all the CLI tools you’ll need for this project. Click Activate Cloud Shell at the top right of the Google Cloud Console.

- Once connected to Cloud Shell, you check that you’re already authenticated and that the project is set to your project ID using the following command:
gcloud auth list
- Run the following command in Cloud Shell to confirm that the gcloud command knows about your project.
gcloud config list project
- If your project is not set, use the following command to set it:
gcloud config set project <YOUR_PROJECT_ID>
Get a Gemini API Key
An API key is an encrypted string that you can use when calling Google Cloud APIs. You can create and manage all your Gemini API Keys from the Google AI Studio API Keys page.
- Go to the API Keys page.
- Click the Create API Key button in the top-right.
- Name the API key “KYC Copilot” and select or import the Google Cloud project you used in the previous step.
- Create your API Key and store it securely.
3. Environment Setup
Before we proceed, we have to prepare the environment for use. This involves enabling APIs, creating a storage bucket, and configuring a Firestore database.
Click this to Enable APIsOptionally: Still in the Cloud Shell, run the following to enable the necessary Google Cloud services
gcloud services enable aiplatform.googleapis.com \
  run.googleapis.com \
  firestore.googleapis.com \
  cloudbuild.googleapis.com \
  storage.googleapis.com \
  aiplatform.googleapis.com
Create Google Cloud Storage Bucket
Create a GCS Storage bucket. Replace [PROJECT_ID] with your project ID
gsutil mb -l us-central1 gs://kyc-copilot-uploads-[PROJECT_ID]
Initialize Firestore
-
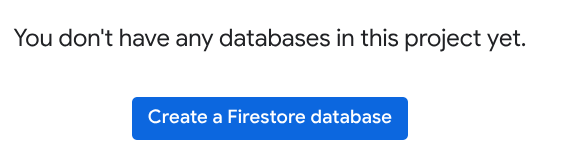
Go to the Firestore Console
-
Click “Create a Firestore Database”
-
On the create database page, do the following:
- For Database ID, give it a name of your choice (e.g kyc-copilot)
- Ensure “Firebase in Native mode” is enabled
- For Location Type, select “Region” and in the region input, give it any region you want (e.g. us-central1)
- Click “Create Databaase”
Environment setup is done! Let’s proceed to writing the code
4. Write the Multimodal Code
To proceed with the rest of our project, we’ll switch from Cloud Shell to Cloud Editor. The cloud editor is another GCP feature that provides a fully featured text editor right in your browser.
To launch the editor, click Open Editor on the toolbar of the Cloud Shell window: 
- In the cloud editor, create a new folder “kyc-copilot”
- Select the folder you just created and create two new files, main.py and “requirements.txt”. At this point, it should look like the following:
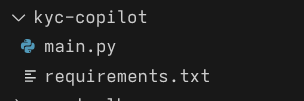
- In the requirements.txt file, list the required dependencies for this project.
google-cloud-firestore==2.22.0
google-genai==1.56.0
Flask==3.1.2
- In the main.py file, we’ll flesh out the complete KYC reviewer. Paste the following code
from flask import Flask,request
import os
import json
from google import genai
from google.cloud import firestore
from time import time

firestore_database_name="kyc-copilot"
gemini_model_code="gemini-3-flash-preview"

client = genai.Client(vertexai=True)
db = firestore.Client(database=firestore_database_name)


prompt = """
    You are a KYC Identity Verification Agent.
    Analyze this image of an ID card.

    Tasks:
    1. EXTRACT the Full Name, Date of Birth, ID Expiry Date, and ID Number.
    2. ANALYZE for risks:
       - Is the ID expired? (Current Date: Dec 2025).
       - Is the person clearly under 18 based on the DOB?
       - Does the ID look clearly fake, altered, or blurry?

    Output JSON ONLY:
    {
        "extracted_data": {
            "full_name": "...",
            "dob": "YYYY-MM-DD",
            "expiry_date": "YYYY-MM-DD",
            "id_number": "...",
            "country": "..."
        },
        "risk_analysis": {
            "is_expired": boolean,
            "is_underage": boolean,
            "alteration_signs": boolean,
            "risk_score": "LOW" | "HIGH",
            "reason": "..."
        }
    }
    """

app = Flask(__name__)

@app.route('/',methods=['POST',"GET"])
def review():
    data=request.get_json(silent=True)

    bucket = data.get("bucket")
    name = data.get("name")
    content_type = data.get("contentType", "image/jpeg")

    if "image" not in content_type:
        print("ERROR: cannot review this file. stopping...")
        return
    if not bucket or not name:
        print("ERROR: bucket and name must be provided. stopping...")

    gcs_uri=f"gs://{bucket}/{name}"
    image_part = genai.types.Part.from_uri(file_uri=gcs_uri, mime_type=content_type)

    try:
        # We pass both the image and the text prompt
        response = client.models.generate_content(model=gemini_model_code,contents=[image_part, prompt])

        # Clean response text
        text_response = response.text.replace("```json", "").replace("```", "").strip()
        result_json = json.loads(text_response)
    except Exception as e:
        print(f"ERROR: AI Processing Failed: {e}")
        return

     # 5. Save to Firestore
    # use the file name + timestamp to ensure uniqueness
    doc_id = f"{name.replace(' ','')}-{time()}"

    db.collection("kyc_document_reviews").document(str(doc_id)).set({
        "image_uri": gcs_uri,
        "analysis_result": result_json,
        "processed_at": firestore.SERVER_TIMESTAMP
    })

    return 'Done processing!'


if __name__ == '__main__':
    app.run(host='0.0.0.0', port=int(os.environ.get('PORT', 8080)))
All this code does is:
- Initialise a Flask application exposing the POST / route
- Receives incoming data, expecting the bucket and object name details, used to construct the complete object GCS URI
- Inserts the image in a well-structured prompt, instructing Gemini to process the image and return a response in a JSON format
- Stores the analysis in a kyc_document_reviews collection in Firestore. These 4 steps highlight the entire application! At this point, we are now ready to deploy the application to Cloud Run and connect it to our storage bucket
5. Serving The Application
All code is complete, and we are ready to deploy the app. As stated earlier, we would deploy our application to Cloud Run.
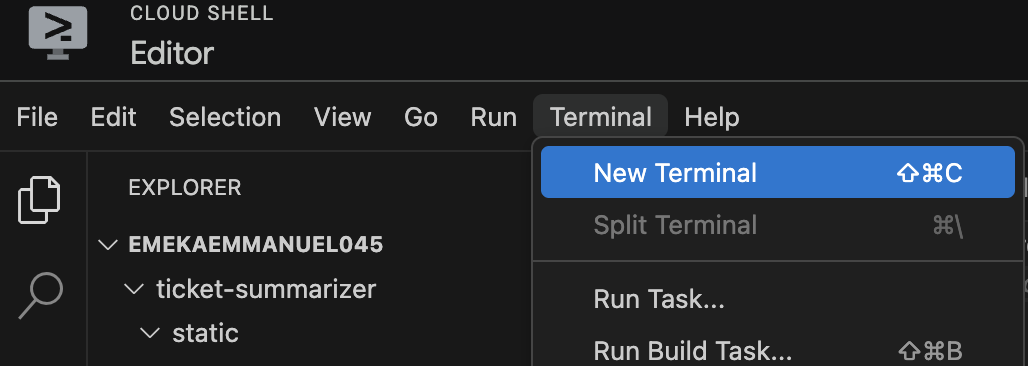
Open the Cloud editor Terminal. This is similar to Cloud Shell but integrated into the Cloud Editor. This way, we do not have to switch between Cloud Shell and Cloud Editor to switch commands. Click the Terminal button at the top left menu and then select New Terminal.
In the newly opened Terminal, run the following commands. At this point, we will integrate the Gemini API Key we created earlier on
# ensure you're in the right directory
cd kyc-copilot

# Ensure your project is correctly set
gcloud config set project <YOUR_PROJECT_ID>

# Add project ID as an env variable
export PROJECT_ID=<YOUR PROJECT_ID>

# Add GCS bucket name to your env variable, this expects your created the bucket as specified  earlier
GCS_BUCKET="gs://kyc-copilot-uploads-$PROJECT_ID"

# Add your Gemini Key as an env variable
export GEMINI_API_KEY=<YOUR_GEMINI_API_KEY>

# Specify region
export REGION=us-central1
Now that we have successfully set the right environment variables, we can proceed to deploy to Cloud Run and set up the triggers.
Deploying to Cloud Run
Deploying to Cloud Run can be done in one line. Still in the same terminal session we just declared the variables, run the following command:
gcloud run deploy kyc-copilot --project=${PROJECT_ID} \
    --region=${REGION} \
    --source=. \
    --platform=managed \
    --allow-unauthenticated \
    --set-env-vars GOOGLE_CLOUD_PROJECT=$PROJECT_ID,GEMINI_API_KEY=$GEMINI_API_KEY,REGION=$REGION
This command creates a kyc-copilot Cloud Run service, enables public access, and sets the required environment variables for the application to run.
After a while, you should see a message that says your application has been deployed successfully.
To verify, head to the Cloud Run Console. In the Services tab, you should see the kyc-copilot service, as shown in the image below.

Once you reach this point, proceed to the next step.
Set up Cloud Storage Triggers and Send to Cloud Run
Right now, your KYC Copilot code is deployed on Cloud Run, but it’s sitting there waiting. It has no way of knowing when a user uploads an ID card. We need a connector.
Meet Eventarc.
Think of Eventarc as a digital courier for your cloud. Instead of writing code that constantly checks the Storage bucket (“Is the file there yet? Is it there yet?”), We let Eventarc watch the bucket for us.
How we will use it:
In this section, you will create a Trigger that listens for a specific moment: “Object Finalized” (a fancy way of saying “Upload Complete”).
-
The Event: A file lands in your Cloud Storage bucket.
-
The Courier: Eventarc grabs the file details immediately.
-
The Action: It pushes that data to your Cloud Run service to start the AI review. Let’s wire this up so your application reacts automatically the instant a file hits the cloud!
-
Head over to the Eventarc Console
-
Click the button, and this should bring up a wizard for configuring the trigger
-
In the Create Trigger wizard, set the following
- Trigger name should be kyc-copilot-trigger
- The Event provider should be Cloud Storage
- For Event Type, select the google.cloud.storage.object.v1.finalized option
- In the bucket input, click Browse and then select the bucket we created earlier
- Set Event destination to Cloud Run
- Select the Cloud Run service we just created: kyc-copilot
- Verify all has been done as instructed from a-f and then click on the create button.
Now that’s all said and done, let’s test it out!
6. Test The Application
Now that our pipeline is fully connected (Storage → Eventarc → Cloud Run → Gemini → Firestore), it’s time to see it in action!
In this step, you will simulate a user submitting their ID card and verify that our “AI Agent” automatically reviews it.
- Get a Sample ID To keep things safe and private, we will use a “Specimen” ID card image for testing. Run the following command in your integrated terminal to download a sample image
wget -O sample_id.png https://raw.githubusercontent.com/Emmanuerl/custom-kyc-copilot/refs/heads/main/samples/sample-id.png
- Upload the ID Simulate a generic user upload by sending this file to your Cloud Storage bucket. This action will immediately trigger Eventarc.
gcloud storage cp sample_id.jpg gs://$GCS_BUCKET/
Note: If your variable is lost, replace $GCS_BUCKET with your actual bucket name.
-
Verify the Results in Firestore The processing happens asynchronously in the background. Let’s verify if Gemini successfully acted as a Compliance Officer.
-
Open the Firestore Console.
-
Select the kyc-copilot database.
-
Look for the collection named kyc_document_reviews.
-
Click on the most recent document (the ID will look like sample-id.png-…).
What to look for: Expand the analysis_result field. You should see a structur ed JSON response where Gemini has:
- Extracted the text from the image.
- Calculated the risk score.
- Flagged issues (e.g., if the sample ID date is in the past, it should be marked as is_expired: true).

7. Congratulations
You have successfully built and deployed a fully automated KYC Copilot using Google Cloud and Gemini .🎉 !
In less than an hour, you transformed a manual, time-consuming compliance task into a slick, event-driven AI workflow. You now have a working prototype that can “see” documents, “think” like a compliance officer, and “file” reports automatically.
Where to go from here?
This architecture is the foundation for many modern FinTech applications. Here are some ways to extend your project:
Add a Frontend: Build a simple React or Flutter app that lets users take a selfie and upload their ID directly.
Human-in-the-Loop: Update your code to flag “High Risk” items for manual review using Google Cloud Pub/Sub.
Secure It: Implement an Identity and Access Management (IAM) proxy (IAP) to ensure only authorised employees can manually trigger the API
Resources and Documentation Vertex AI & Gemini: Generative AI on Vertex AI Documentation
Cloud Run: Cloud Run Documentation
Eventarc: Eventarc Triggers Overview
Firestore: Get Started with Firestore
Thank you for participating! Now go build the next generation of intelligent apps! 🚀